buy weed online, cannabis, cannabis use, Marijuana, weed
How to Roll the Perfect Joint: A Step by Step Guide
Are you new to cannabis? Have you always relied on your bff to roll your joints? Have you just never mastered how to roll a joint? We know it can be difficult for a new smoker (and even old smokers) to roll a joint. So, we’ve created a step-by-step guide that will tell you how to roll the perfect joint!
What You Need to Roll a Joint
- Cannabis
- A grinder or scissors
- Rolling papers
- A tiny piece of cardboard
Step 1: Grind Your Weed
One of the biggest mistakes rookie cannabis enthusiasts make is not grinding their weed properly. If your nugs are ground too thin, you will get an odd chlorophyll taste and will burn too fast. Too chunky, and your joint will have to be relit every few seconds. Avoid this by getting a good grinder, however, if there is no grinder in sight, use a shot glass and scissors and cut up your nugs.
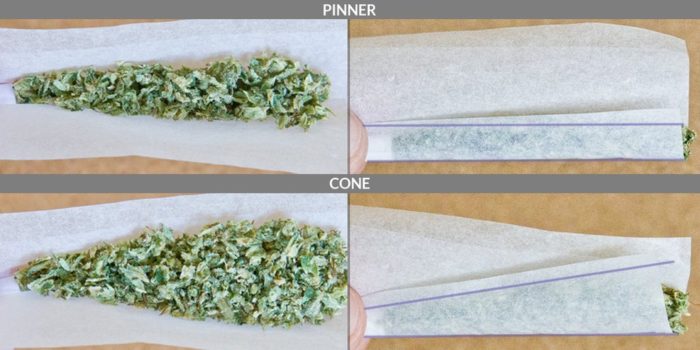
Step 2: Arrange Your Bud on Your Rolling Paper
There are different ways to arrange your bud on a rolling paper. Some use premade cones, some roll into cones and some roll just a straight blunt. Choose the way you want to arrange your nugs.
Step 3: Filter or Crutch
Have you ever been passed a joint where the end is wet with the last person’s saliva? In order to avoid this, create a filter. Roll up a piece of cardboard and place it on the end of the unrolled joint. Once the weed is in place, it’s time to get rolling.
Step 4: Roll!
This part may take some practice. Lots of practice. Gently pick up your paper filled with your fave strain and the filter and start to roll the end (the non-sticky end of your paper) under the bud and filter. It takes practice tucking the paper under the bud and filter. Try to ensure that your joint is packed in tight as you go. Getting this part perfect may be frustrating. Don’t get discouraged now. You’ve come so far. It may take lots of practice, but you’ve got it! Try starting with the cone design as it may be easier and master your way up to a spliff.

Step 5: Stick It
Once you have your rolled joint in hand, wet the sticky side of the rolling paper stick it as tightly as you can around the shape you’ve created. You don’t want to leave space for the weed mix to shuffle around.
Step 6: Light It
Light your beautiful joint.
Step 7: Enjoy
Enjoy your hard work. You’ve earned it. If you are with friends, puff puff, pass!

Banner image by Thought Catalog.